The BEST Buttermilk Biscuits you ever will eat!

I said it! I really did! And if you make these biscuits you will have to agree with me. These are 100% the best buttermilk biscuits you ever will eat whether you make them vegan, as I did, or not. [Just so you know, if you make these  vegan for a crowd, they will not be able to tell that they are, trust me!]

This is one of those recipes that was passed down from my mother’s best friend’s grandma. Got that? 😉 I would always ask for Robin’s (my mom’s friend) biscuits when she came to spend the weekend with us. One day, when we went down to visit Robin, my mom finally learned how to make them! Oh joyous Saturday morning breakfast from then on!

Everyone kept asking my mom for the recipe to her delicious biscuits, and very graciously, my mom sent out an email that detailed every step of how to make them. So here are the steps, very detailed, in picture form from me! Huh, maybe together my mom and I could be writer/photographer for a step-by-step recipe book =)

So here we are.

The BEST Buttermilk Biscuits you ever will eat:

IMG_5809

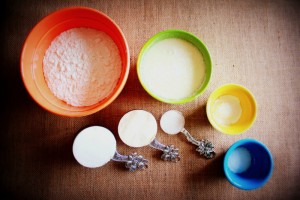
What you will need:

  • 2 1/4 cup Soy milk or your choice of milk, just make sure it is capable of being turned into “buttermilk”
  • 2 1/4 Tbs Vinegar,
  • 3 1/2 cup flour +extra for the counter,
  • 4 3/4 tsp Baking Powder
  • 1 3/4 tsp salt
  • 1 Tbs sugar
  • 1 cup Crisco
  • 1/2 cup Earth Balance or choice of butter option

– Mix the soy milk and the vinegar, whisk well and set to the side (curls to form a buttermilk)

IMG_5811 A

Place butter in a 13X9 pan then place the pan in the oven as it heats up to 375. But remember to take it out after about 5 minutes, it’s just so the butter can melt. Set the pan to the side.

IMG_5811

Now, you can use a self rising flour, but I don’t have any. It is very easy to make your own, which is what I did in this recipe.

IMG_5814

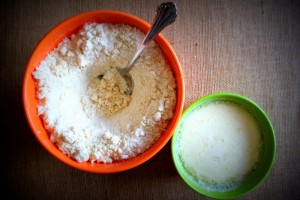
Mix your flour, baking powder, salt, and sugar together.

IMG_5816

Next, what you will need is a pastry cutter, or fork and knife if you don’t have one.

IMG_5818

Cut the Crisco into the flour mixture. Lumps are OKAY! Just make sure you get to the very bottom of the flour mixture as well.

IMG_5819

Make a “well” in the center of your flour mixture.

IMG_5821

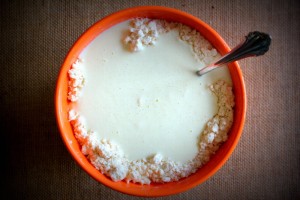
Pour your “buttermilk” into the center of the well.

IMG_5823

Slowly take a spoon and drag the flour from the edge through the center to the other edge. Just until the wet has cut through all the dry. Don’t over do it so your biscuits will be fluffy!

IMG_5824

Prepare a floured surface.

IMG_5825

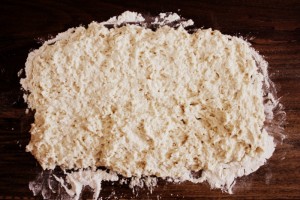
Push dough out into the shape of a 13×9 pan with your fingers. (make sure your hands are VERY well floured)

IMG_5829

Slip your well floured hand underneath one side, flip it to the center. Repeat with other three sides.

*note. The dough is supposed to be really wet. Don’t think you have done something wrong or forgot an ingredient

IMG_5830

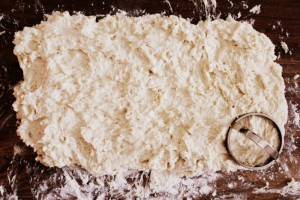
Press the dough back out into a 13×9 shape again.

IMG_5831

Using a biscuit cutter, or what ever circle cutter you have, use all the dough to cut 15 circles.

IMG_5832

As you are placing your cut biscuits into the melted butter pan, flip them in the butter to coat the top and bottom.

IMG_5835

Bake them in the 375degree oven for 15 minutes, rotate the pan and bake them for an additional 8-11 minutes. Just watch them to make sure they won’t burn.

IMG_5841

And enjoy! Here I have them with my momma’s homemade strawberry jam. Let’s just say that right after the photo was taken, my subjects quickly disappeared 😉

Hope you enjoy them as much as we do! Makes breakfast for dinner amazing!!!!
Cheesy Quinoa Stuffed Avocados

Yes, cheese is in the title of this one, BUT it’s vegan 😉 This is a favorite dish of mine and my hubby. Not only are the avocados stuffed, you will leave feeling stuffed yourself, but guilt free since they are all healthy-good ingredients!

I will confess, there is a lack of photos documenting this meal. It really is more of a guideline instead of an actual recipe. I usually make them towards the end of the week and I use all the leftovers from prior meals in it.

So here it is, the recipe or guideline of one 😉

Cheesy Quinoa Stuffed Avocados:

IMG_5509

Ingredients:

fills 3 avocados

  • 1/2 cup cooked quinoa
  • 1 tsp minced garlic
  • 1/4 cup cooked peas and/or corn
  • 1/2 cup cooked beans (your choice. In this particular meal I used 1/4 cup Great Norther and 1/4 cup Black)
  • 1/2 cup Daiya Cheese (your choice of mozzarella or cheddar style shreds)
  • salt to taste
  • 3 avocados, halved, pitted and meat taken out of skin

Directions:

  • Mix all ingredients except avocados in a small microwavable bowl, or a small sauce pan. Heat it up in either sauce pan or microwave until cheese has melted.
  • Once cheese has melted, stuff the avocados.
  • Place in oven safe dish and warm up the avocados in oven, or microwave them just until warm.
  • Plate and serve

I serve mine over a bed of “re-fried” beans, link here, and top it off with some 3 minute salsa. Can we say yummy! Oh I wish I could eat some more of this right now…too bad it has been all eaten up!

I have also mixed in sauteed mushroom, sundried tomatoes, bread crumbs, onion…etc, etc…point being I have mixed this so many ways and they have all been wonderful!

Let me know how you like it or any way you would improve it! I love hearing new ideas, so make it your own =)

Sugar-free Chocolate Breakfast Pudding

This past weekend was an amazing one! Saturday my husband, baby and I got to go to Johnson City, TN (the closest “biggest” city to where we live). We decided to do our weekly shopping while we were there, so I had a car full of coolers and ice packs. It was so much fun! We went to Earth Fare, yes, a bit more expensive than I’m used to, but all their produce was beautiful!

After I got my hubby off to work this morning, I decided to break from my usual oatmeal breakfast and try something new. When Caroline was around 6 months old and experimenting with new foods, I had a friend tell me that when her adorable twin boys were babies, she mixed up and avocado and a banana together and fed it to them. I tried it and Caroline loved it!

For some reason  I forgot about that little trick, until this morning.

You would think that combo would be really weird, but avocados are really accepting of other flavors and usually just add creaminess instead of flavor. I love avocados!

Instead of only mixing those two items up, of course I would have to add some chocolate 😉

Sugar-free Chocolate Breakfast Pudding:
Servings: 1

IMG_5501

Easy three ingredients: 1 banana, 1/2 ripe avocado, 1-1 1/2 tsp cocoa powder

IMG_5502

Add all ingredients to a food processor or blender, or your ninja like I have pictured. I like mine a more chocolatey rich flavor so I added 1 and 1/2 tsp of cocoa powder. If you don’t want it as chocolaty, only all 1tsp. Blend until it has a creamy pudding texture

IMG_5508

And you are done! One sugar-free, chocolaty deliciousness! Reminds me almost of a doughnut filling for some reason!

Hope you enjoy this as much as my little girl and I did…it only lasted maybe 5 minutes between the two of us after the last photo. It was hard trying to keep her little hand out of the picture because she wanted “mah-mah-mah!” (a.k.a. “more” said with her version of the ASL sign for more) 😉

Sugar-free Chocolate Breakfast Pudding:

Ingredients:

  • 1 banana
  • 1/2 avocado
  • 1 to 1 1/2 tsp of cocoa powder*

Directions:

  • add all ingredients to a food processor and blend until creamy smooth.
  • *1tsp is a chocolate flavor, but I like mine really chocolaty.

Quinoa Fajita Stuffing

In my extensive search for creating a meal that is filled with nutrients and tasty (a.k.a. staring into my refrigerator until an idea pops into my brain), somewhere the idea of quinoa fajitas came around.  Both my hubby and I really enjoyed this meal, and so did our 15month-er.

A little bit of a back story, since yesterday was my first day at being 100% vegan, I was a bit stumped when it came to dinner time. Like I have said before, I have always used some type of cheese or yogurt product when making dinner, but since we officially found out what my little girl is allergic/sensitive to, vegan it is! Any way, I had this beautiful meal in my brain (key words) planned out, I was going to make quinoa fajitas, with guacamole and salsa, and as a side I was going to ‘veganize’ a recipe for a bloomin’ onion that I found, and then I was going to make up a vegan dip for the onion.

It all looked beautiful, as you will see in the final picture, and all but the vegan dip tasted yummy. The fajitas were delicious, but I couldn’t make the guacamole because the avocados weren’t ripe enough. The bloomin’ onion was good, but somehow the onion itself needed to be cooked a little longer without burning and all the crumbs fell off the peddles since I didn’t use an egg wash. And last but not least, I attempted to make a “creamy” sauce, but since my little one is allergic to coconut and soy, well, it just didn’t taste very good.

But! I will tell you how I did the quinoa fajitas and hopefully if you make this meal, all your other sides will turn out a lot better than mine did 😉

Quinoa Fajita Stuffing:

IMG_5475

Ingredients: 3/4 cup dry quinoa, 1 1/2 cups vegetable stock (or water if you wish), 1Tbs olive oil, 1 tsp minced garlic, 1 sweet onion sliced, 3 or 4 small sweet peppers, and at least 2 tsp taco seasoning with option to add more to taste.

IMG_5477

First step is to pour vegetable stock (or water) in a small sauce pan and add quinoa. Bring to a boil then reduce to a simmer until all liquid has been absorbed. About 20 minutes.

IMG_5478

In a skillet, add olive oil and garlic and saute until fragrant, about 3o secs. Add onion and sliced sweet peppers, and saute until onions are caramelized and peppers are soft.

IMG_5482

Once quinoa has been cooked, add 2tsp of taco seasoning, or more if you desire.

IMG_5488

Mix in your veggies and serve with guacamole, beans, salsa, lime wedges, or anything you wish!
(and obviously tortillas)

Quinoa Fajita Stuffing:

Ingredients:

  • 3/4 cup dry quinoa
  • 1 1/2 cups vegetable broth or water
  • 1 Tbs olive oil
  • 1 tsp garlic
  • 1 sweet onion, sliced
  • 3 or 4 small sweet peppers, sliced
  • 2 tsp taco seasoning + more if desired  — recipe here

Directions:

  • In a small sauce pan, add quinoa and vegetable broth (or water). Bring it to a boil then reduce to a simmer until all liquid has been absorbed. About 20mins.
  • In a skillet, add olive oil and garlic and saute until fragrant, about 30 secs. Add onion, and sweet peppers and saute until onions have caramelized and peppers have softened.
  • Once quinoa has completed cooking, add 2tsp taco seasoning or more to taste.

Ideas to serve with:

  • guacamole
  • 3 minute salsa
  • tomatoes
  • Tofutti
  • lime wedges
  • black beans
  • or any other yumminess you can think of =)

Sugar-Free Cinnamon Breakfast Oats

This is my first day at being 100% vegan, and what better way to start it out than with some yummy oatmeal?

My daughter’s pediatrician recommended I watch Sugar the Bitter Truth on YouTube several months ago. We all know sugar in large quantities is bad, but sugar in small amounts is not the best either.  And for anyone who knows me on a personal level can tell you I have a HUGE sweet tooth! It can be so bad, that when there are “blackies” (my family’s recipe for triple chocolate brownies, so chocolatey you can’t just call them brownies) I will literally get mean if you try to take away my 2nd…or 3rd…or, okay, I’m just addicted to sugar.

I have never been over weight, and have usually always had a “nice” figure, but I have this cushy layer of sugah-fat that likes to cover my body. So what better way to start being (mostly) sugar-free than to kick it off with my vegan diet? Make a complete life style change for the better, to teach my child and hopefully future children.

Here we go.

Sugar-Free Cinnamon Breakfast Oats:
serves: 2
(or one big serving, if you don’t want to share)

IMG_5439

Ingredients: 1 banana, 3/4 cup raw quick oats, 1 1/4 cups water, 1/16 tsp + more to sprinkle on top of cinnamon.

*This step not pictured, since it’s boring. Pour water in a sauce pan, bring to a boil, add quick oats and cook until tender*

IMG_5440

In your serving bowl, mash up 1 whole banana with a fork (you can add up to 1/2 a banana more if you wish it to be sweeter)

IMG_5441

Add your cinnamon and mix it together.

IMG_5443

Stir in your oats and enjoy! Super easy and yummy!

You could also add in blueberries, or strawberries, your favorite nuts, coconut flakes, or even some chocolate chips if you want to make it a bit fun!

Make it your own sugar free breakfast! Let me know how you like it =)

Loaded Southwestern Vegetarian Quesadilla

I apologize for the lack of pictures, I will update it the next time I make them, promise! I had a starving hubby on my hands so no time for the extra time to take a picture.

BUT, we both LOVED this meal. It was so yummy, I could eat it every night this week! I want it to remain that delicious so I won’t burn myself out.


Loaded Southwestern Vegetarian Quesadilla
Makes 6

Ingredients:
– 6 Burrito Flour Tortillas

Stuffing:

– 1 Red (or green or yellow, or orange) Bell Pepper
– 4 Campari Tomatoes
– 1/2 Videlia Onion chopped
– 2 Avocados (the “meat”) sliced and diced
– 1 Cup Cooked Black Beans
– 12-14 oz Shredded Sharp Cheddar Cheese

Sauce Topping:

–  1/3 cup Plain Greek Yogurt
– 1/6 cup Mayonnaise
– 1/2 Tbs Taco Seasoning  — Recipe here
– 1/2 Tbs Ranch Seasoning — Recipe here


Directions:

– In a small bowl, mix all sauce topping ingredients together and set in refrigerator to remain chilled.

– Prepare all stuffing ingredients. Lay out tortillas. On half of tortilla, layer cheese, beans, onion, tomato, bell pepper, and avocado. Place in a skillet one at a time, folded in half until golden brown on both sides and cheese has melted.

– When ready to serve, slice into 4 “quadrants” and dollop a bit of the sauce on each quadrant.


Hope you enjoy them as much as my hubby and I did!
Let me know what you think below!

Chocolate Cherry Ice “Cream”

Oh my goodness. That is all my brain tells me, as I sit here eating the very thing I am  blogging about. I couldn’t wait to share this new recipe.

The wonderful thing about this is there is no cooking or baking skills required. You only need to know how to slice up fruit (and it doesn’t have to be pretty) and how to work a blender.

I have found, since eating mostly whole foods and plant based foods, that my body really does not seem to like ice cream anymore. And I make my own ice cream! Ice cream is one of those sweet chilly treats that I can sit down and eat a half gallon by myself. My husband will attest to that 😉

I was actually making this for my little one since she has so many food allergies it is challenging to feed her a wholesome treat for those in-between meals. She wasn’t interested in trying because all she had on her brain was “mmk” or in adult language “milk.” So darn, I couldn’t let this go to waste, so I am eating it as we speak. It is so good!!!! Caroline is going to be disappointed in what she missed out on.


Chocolate Cherry Ice “Cream” isn’t really cream at all. This is a 100% vegan or plant based treat. So ideally you could eat this as breakfast and not feel guilty at all!

Here is how to make it:

IMG_5424

You will need coco powder, one frozen banana sliced, half of a sliced frozen avocado, a handful of frozen cherries, and a little bit of sugar (I have been using Zulka sugar and loving it)

IMG_5428

Place all fruits in a food processor along with 1 Tbs of coco powder, and I did use 1 1/2 Tbs sugar – you might be able to leave that out – and I added a few Tbs of water for texture, but you could also add any type of plant milk or if you wish any other kind of milk. Blend until smooth!

IMG_5431

And serve! Ahhhh! So yummy!  I just put a double batch of fruit to freeze for an after dinner dessert.

IMG_5434

She eventually came around. I mean, how can you refuse chocolate?!?!

Chocolate Cherry Ice “Cream”

Ingredients:

– One banana, sliced, and frozen
– Half an avocado, sliced and frozen
– Handful of cherries, pitted and frozen
– 1 Tbs coco powder
– 1 1/2 Tbs sugar (you could lessen or leave out)
– water, plant milk, or other milk for consistency

Directions:

Place frozen prepared fruit into a food processor with coco powder and sugar. Blend and add your choice of liquid until desired consistency.


Sweet and Savory Kielbasa

I am not a person who cooks a lot of meat items, but since I am a wife with a hubby who has “meat” needs, I will cook a meat item once or twice a week. Kielbasa is the one sausage that I have loved ever since I was a child. I have always eaten it with fried potatoes and ketchup. Yep, that is my combo! So good.

Usually after that specific meal, I leave the dinner table feeling very heavy. So, to appease my hubby and my veggie loving self (my hubby loves veggies too, not to give the wrong impression) and my baby girl, I put a new twist on the traditional recipe.


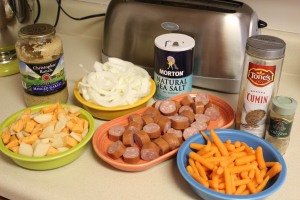
Sweet and Savory KielbasIMG_5405

Ingredients: 2 russet potatoes and one medium sweet potato cubed. 1 fairly large Vidalia onion sliced, 3 or 4 big handfuls of organic baby carrots, two Kielbasas of  your choice coined, minced garlic, cumin, coriander, and salt.

IMG_5408

Saute 1/2 Tbs of garlic in olive oil.

IMG_5409

add the potatoes and carrots. Place the cover on and cook for about 10 minutes while stirring occasionally.

IMG_5410

This is what they should look like.

IMG_5412

Add the onion.

IMG_5413

Once the onion has cooked down a little bit, add the Kielbasa, 1/2 tsp cumin and 1/2 tsp coriander.

IMG_5417

Salt to taste and serve!

Sweet and Savory Kielbasa:

Ingredients:

– 1/2 Tbs minced garlic
–  Olive Oil
– 2 russet potatoes, peeled and cubed
– 1 medium sweet potato, peeled and cubed
– 3 or 4 large handfuls of organic baby carrots
– 1 fairly large Vidalia onion, sliced
– 2 Kielbasas of choice, coined
– 1/2 tsp Cumin
– 1/2 tsp Coriander
– Salt to taste

Directions:

Add about 3 Tbs of olive oil to a large skillet with the minced garlic. Saute about 30 sec over med high heat. Add potatoes and carrots. Cover and cook for about 10 minutes while stirring occasionally. Add onion and cook down for about a minute. Add Kielbasa, cumin and coriander. Cook until onions are sauteed and Kielbasa is completely heated through. Salt to taste.

Let me know how you liked this recipe! If you have any suggestions I would love to know them. Hope you enjoy =)


Vegetarian Style Lunches

Sometimes we all get in a bind with what to fix for lunch. My hubby usually just likes a quick sandwich to take to work, and then some raw veggies or the occasional side of chips, etc.  I would get so bored having to eat a sandwich every day for lunch. I am more of a wrap girl. I can put anything from grilled veggies, to hummus and never get bored with them.

I wanted to share a few combinations that I have come up with of healthy lunches that will keep you feeling full and satisfied.

First off, here is how I make the Zesty Quinoa that I used in both of these wraps:

Zesty Quinoa
Ingredients:

1 cup dry quinoa (this makes a lot so it should last the whole week in the fridge)
1 tsp of minced garlic
Juice of one lime

Directions:

Cook quinoa as directions on package, but add the garlic with the water (or vegetable broth). Once it has been cooked, squeeze the juice of one lime over the cooked quinoa and mix it in. If  you want you may add salt and/or pepper, but I usually just leave it alone.


Okay now that you know how to do that, here are two different lunch combos, that are both delicious and nutritious!


First off, the Veggie Hummus Wrap (vegan):

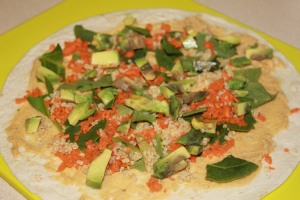
IMG_5384

Take your hummus of choice and smear a thin layer all over the wrap. Add chopped carrots (I put a handful of baby organic carrots in a food processor), some chopped up baby spinach, chopped up avocado, and sprinkle a healthy portion of the zesty quinoa (recipe above).

IMG_5386

Starting from one side, roll up the wrap and slice in half.

IMG_5390

Now, as a side dish to this delicious meal, I sliced some Campari tomatoes and olives. Mix together with basil (fresh basil is the best, but I don’t have my basil plant up and going just yet, so I had to do dried) and drizzle with olive oil. Yum!!!

Here is the Zesty Quinoa Bean Wrap:

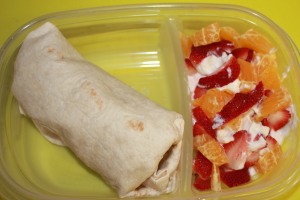
IMG_5395

This is really more like a burrito than anything, but still an easy healthy lunch. I make my own “unfried” beans and here is the link to the recipe I use. Add the “unfried” beans, zesty quiona, avocado, baby spinach, and tomatoes and wrap it up burrito style =)

IMG_5396

As a side dish for this wonderful dish, I took Greek yogurt (you can use either plain or vanilla. or whatever you want), and I slices some strawberries and oranges to mix in.

Now something a lot of people don’t really think about…What to drink with your lunch? You spent all that time thinking of how you could create a healthy lunch, you better not go grab a pop!!! [soap box time, sorry] Pop (or soda as I should call is since I moved to the south) is not healthy in any way shape or form. Not even diet, the artificial sweeteners can cause cancer and the carbonation is not the best thing for your body.  … okay, my rant is over.

There are several healthy options to take, but since I did two lunches, I will show you what I took with them.

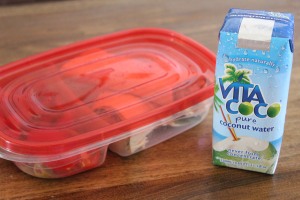
IMG_5403

Oh, Vita Coco!!! Love this beverage! For some reason I am not a fan of Zico, but Vita Coco is a favorite of my little family here. Even my baby girl loves this stuff. Costco sells them in big packs  of personal sized drinks, which is ideal for taking for lunch.

IMG_5404

This is my option that I usually take. I love my reusable up. It is mine, I know where it has been, I know that I have washed it, and also it has pink paisleys all over it. Makes me happy.  Anyhow, water with lime juice is my favorite. I have a hard time drinking regular water, but it doesn’t take much lime juice to add flavor. Water is quite adaptable, you can squeeze lemons, mango, lime, etc. in it and it takes it to a new level.

Hope this gives some ideas to you! The good thing about this type of lunch is that there is no end to the possibilities! At the beginning of the week, buy several different veggies, hummus, and have an assortment of beans and quinoa on hand and you have a lot of combinations you can go for to make quick and healthy lunches. Give your taste buds an adventure 😉

Let me know what type of lunches you like to take with you throughout your week! I love having different options and ideas.

Crock Pot Vegetarian Soup Beans

I am quite sure it has been well over a month since I last blogged. I keep waiting for life to “slow down” (hahaha) so that I can do pretty much anything other than look up a recipe or facebook for a few minutes here and there on the internet. I have simply come to the conclusion that life just doesn’t slow down. Sure one thing will end, but it is always followed by another.

Since the last I have posted, we have had an ER visit (we found out the hard way that our daughter who is now 14months is allergic to peanuts and cashews), we have had my husband’s wisdom teeth removed, and we have moved. The moving was very quickly done and we hadn’t planned on moving until next year, but our landlord (we live in a townhome “village”) offered us a deal that was for a three bedroom instead of the two that we were in and for $50 less a month. Long story short, we moved in about a week after they told us about it.

So now that life is getting back to normal, hopefully I will be able to blog a little more often.

Now, I’m not sure about where you live, but around here, it has been raining for a good two weeks. Not just raining, but lightening and thunder and wind and all that good stuff that comes with a big storm. I hear there have been several tornadoes in the Midwest, and so I guess I should be thankful that we live in the mountains and are only getting the storm part. This weather does not scream “almost-summer-the-pools-are-opening-next-week” to me, so we have been eating a lot of soups for dinner.

For awhile now, I have been craving soup beans, but ALWAYS forget to soak the beans overnight. This morning I woke up, got my hubby off to work and decided that there has to be an easy way to cook dried beans without soaking them. After a little research online, I found out that you could either in a dutch oven, which I don’t have, or in a crock pot, which I do have. Then I went on to search out recipes that didn’t involve ham, and I couldn’t find one to my liking, so what to do? Make up the recipe.

It has turned out amazing!

IMG_1236

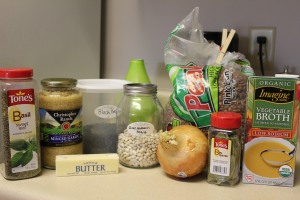
Ingredients: 1 cup each of the following, dried pinto beans, dried great northern beans, dried black beans. 6 cups of vegetable broth, 3/4 of a very large Vidalia onion thinly sliced, 1 Tbs minced garlic, 1tsp dried basil, 2 bay leaves, 1/2 stick of butter, and salt and pepper to taste.

*Side note* This is very easy to make vegan. They only thing making this vegetarian and not vegan is the butter. I usually use a vegan butter, but in this instance it was easier for me to use real butter instead of a soy based product.


I didn’t have time to take an in between photo because I was running out the door to have lunch with my hubby (the awesome thing about crock pots! have dinner ready when you get home!) but here is what you do….Throw it all in the pot except for the salt and pepper! Turn it on high heat for 6 hours, when the beans are tender salt and pepper to taste!

IMG_1238

Tah-dah! You are done and the prep work only takes as long as it does for you to dump beans and slice an onion! They are so yummy! and you don’t feel very heavy eating them like you do when there is ham or other meat products in them. =)

Let me know how yours turn out if you try them, or if you added anything else to them. I think carrots would be a nice addition. Make them your own!


Ingredients:

1 Cup dried Black Beans1 Cup dried Pinto Beans
1 Cup dried Great Northern Beans
6 Cups vegetable broth
3/4 very large Vidalia onion, sliced thinly
1 Tbs minced garlic
1 tsp dried basil
2 bay leaves
1/2 stick of butter (4Tbs)
Salt & pepper to taste


Directions:

Add all ingredients to a crock pot except salt and pepper. Turn on high for 6 hours, or until beans are tender. Once tender, salt and pepper to taste. Serve with corn bread, or rice, or if your from the north, add ketchup or whatever you like!